
 1581
1581
You can only create program after you have created courses.
If you are part of a chain, please speak with your corporate learning and development team BEFORE you create programs as this will affect compliance percentages.
1. Go to Site Administration > Programs

2. Scroll to the bottom of the window and select ‘Add a program’.
![]()
3. Fill in a Program title (remember to add the province code: ON_ or AB_ or BC_)
e.g.: ON_ORCA_DII
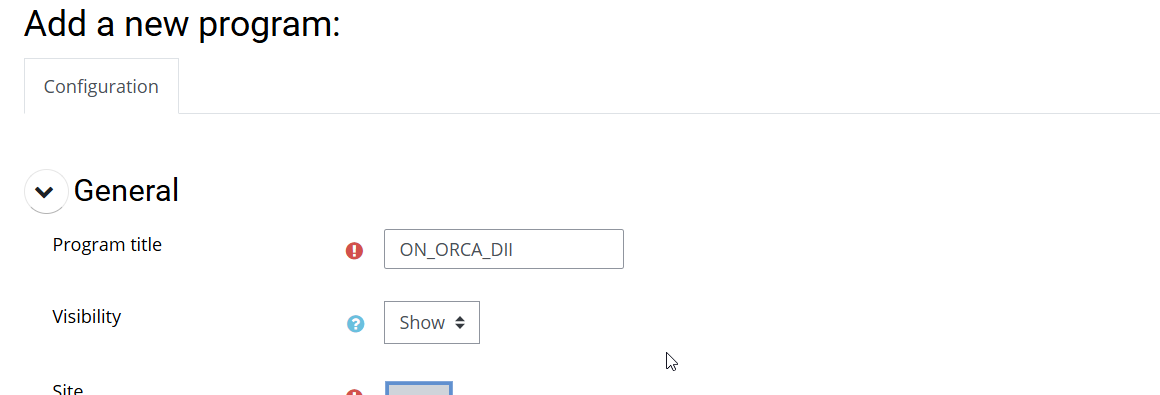
4. Site: Choose the top level of the site hierarchy the program applies to. Start typing your organization name and it will appear below the box to select.
NOTE: DO NOT create a program that contains more than one province. Each type of province should have their own program.

NOTE: You can add notifications to your program if you would like staff to get reminders. The default is no notifications.
5. Select 'Save'.
6. You then will be directed to the 'Courses' tab.
In the box 'Add a course', start typing the course name to add to the Program and select the course name you’d like to add. Once you see the course in the drop-down, click on the course to add it to the program.
NOTE: You can see all courses in TLC. If you choose a course that is not visible to your organization, your staff will not be able to complete.
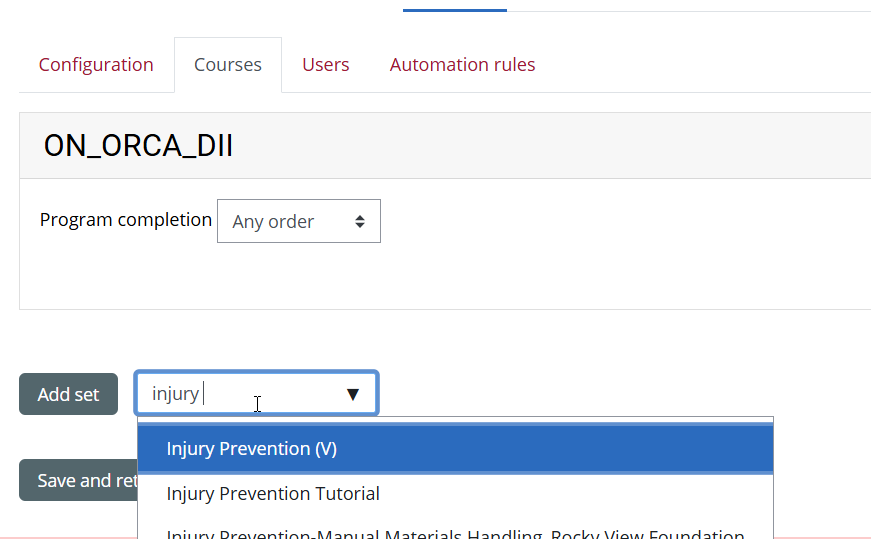
NOTE: You can add more than one course to a program.
7. Once you have added all the courses, click 'Save and return'.

ADDING STAFF TO THE PROGRAM
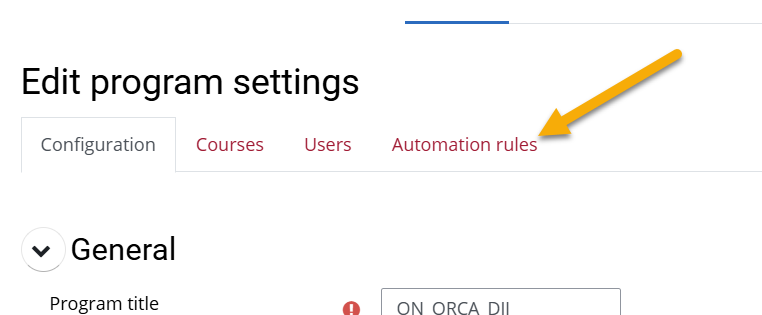
You will be brought back to the Program list. Your new program will be the top row.
8. Select the 'Edit' icon to the right of the Program you created.

9. Select the tab 'Automation rules'.
10. Select the following:
- check box for Automatically assign
- check box for Automatically unassign
- ‘Add condition…’.

*This is where you choose the conditions of who will be automatically enrolled in the program.
DO NOT create a program that has both ‘Member of’ profiles AND ‘Manager of’. Each type of role should have their own program.
11. Select ‘User profile’.

12a. In the User profile fields
a. Select the dropdown in the first box and select ‘Member of’ if the program is for front-line staff, or ‘Manager of’ if the program is for Managers.
b. Select the dropdown in the second box and select ‘contains’.
c. In the third text box, type in the site (as it appears in the Site list in TLC) until you get to where the program applies to.
*If you look at a profile under Add/Edit users, you will see (and can copy) how your organization appears in TLC.

For example:
*If the program applies to a particular province, you will enter: Retirement Organization (ON)/ or Retirement Organization (AB) , etc.….
*If the program applies to a particular community, you will enter: ABC Retirement Home
12b. If the program applies to a particular department you will need to add another condition. Select ‘Add condition’ under the first condition.
a. Select the dropdown in the first box and select ‘Member of’ if the program is for front-line staff, or ‘Manager of’ if the program is for Managers.
b. Select the dropdown in the second box and select ‘contains’.

c. In the third text box, type in the department (as it appears in the Site list in TLC). For example, ‘Kitchen’ or ‘DC Opt’.

NOTE: If there is more than one department, select ‘Condition set’ for the second condition and follow steps a, b & c above for each department.
*You must update to ‘any’ (as shown in the screen shot below).

13. Select Save Changes.

TO UPDATE A PROGRAM
(to add/update conditions and/or courses)
1. Go to Site Administration > Courses > Programs.

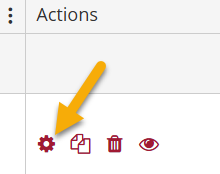
2. Click on the cogwheel to the right of the Program Title you would like to update.
3. Make changes in line with instructions for adding conditions using 12a & 12b for user conditions and step 5 to add/edit courses in a program, in the first section of this document.
CHECK PROGRAM ENROLLMENT
1. Go to Site Administration > Courses > Programs.

2. Select the 'Edit' icon to the right of the Program you want to view enrollment for.
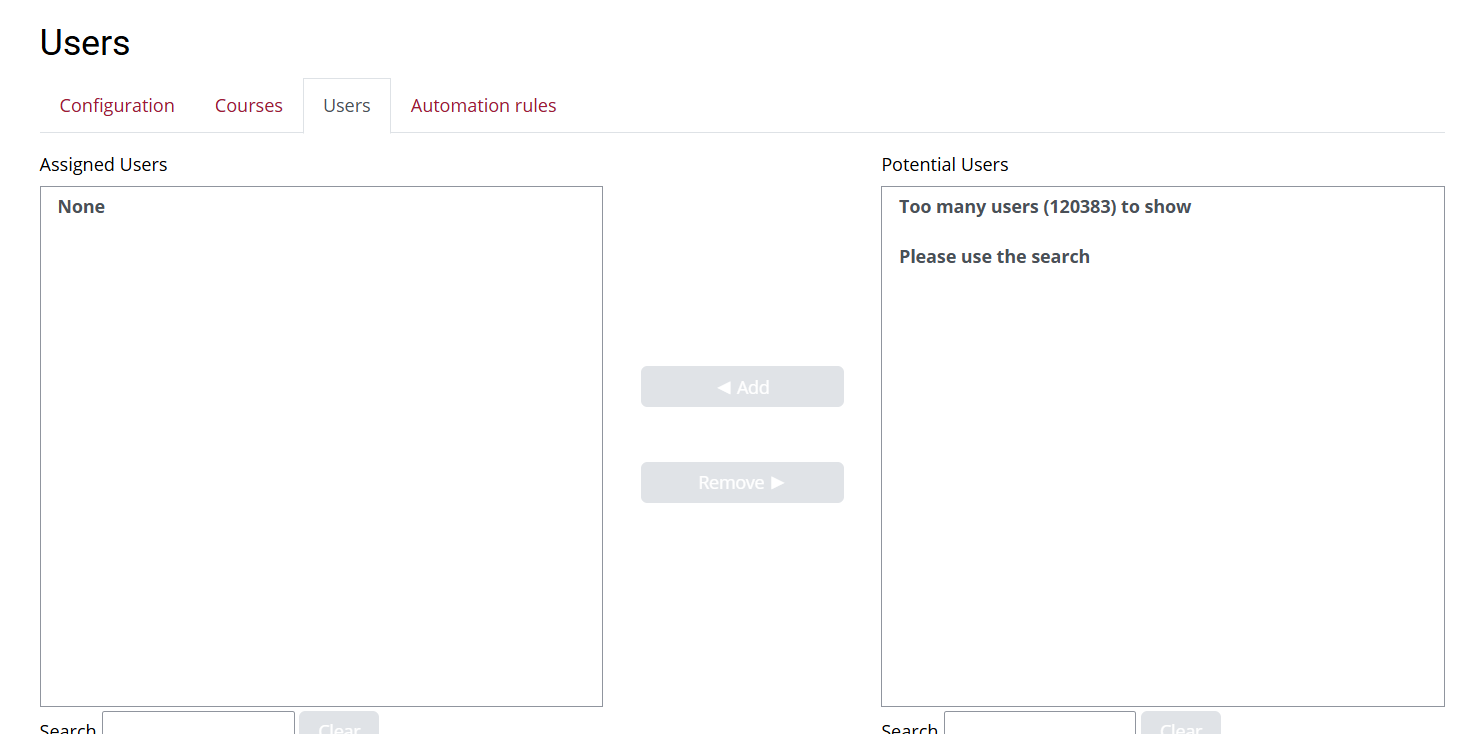
3. Select the 'Users' tab. This will show you how many users are enrolled in the program. You can use this to add users to a program, BUT if they do not fit the Program Assignment criteria, the system will remove them.
NOTE: Do not remove profiles from this window. They will be removed from the program but will still be enrolled in the courses you chose for that program.
COPYING PROGRAMS
(If you need to create programs for each provinces and/or Member & Manager)
1. Go to Site Administration > Courses > Programs.

2. Click on the copy icon to the right of the Program Title you would like to update.

3. Make changes in line with instructions for Add a New Program above.
DELETING PROGRAMS
NOTE: Only delete the program after you unenroll everyone from a program. Please follow the instructions below.
1. Go to Site Administration > Courses > Programs.
2. Select the 'Edit' icon to the right of the Program you want to remove.
3. Select the tab 'Automation rules'.
4. Click on the third text box beside User icon to the right of the ‘User Profile Fields’ and type ‘xyz123’.
5. Delete all other conditions by clicking the ‘x’ to the right of each condition, leaving the one condition you just updated.

NOTE: Staff must be unenrolled by the program to remove the course from their profile. If you just deleted a program, staff will remain enrolled.
6. Select ‘Save’ at the bottom of the window.

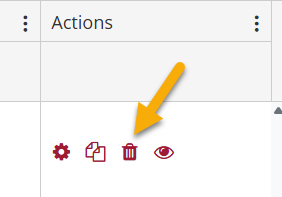
7. Once everyone has been removed from the program, select the trash can icon to delete the program. (This will take a few minutes)
HIDING PROGRAMS
Hiding programs will not unenroll staff from a course. To hid a program, select the 'eye' icon.
ORCA strongly suggests that you do not hide programs as it could create issues with your compliance meter.
If a program is no longer needed, please follow the instructions above to delete a program.
If you have any questions or concerns, please contact [email protected].


